Question 16
Construct the following figure.
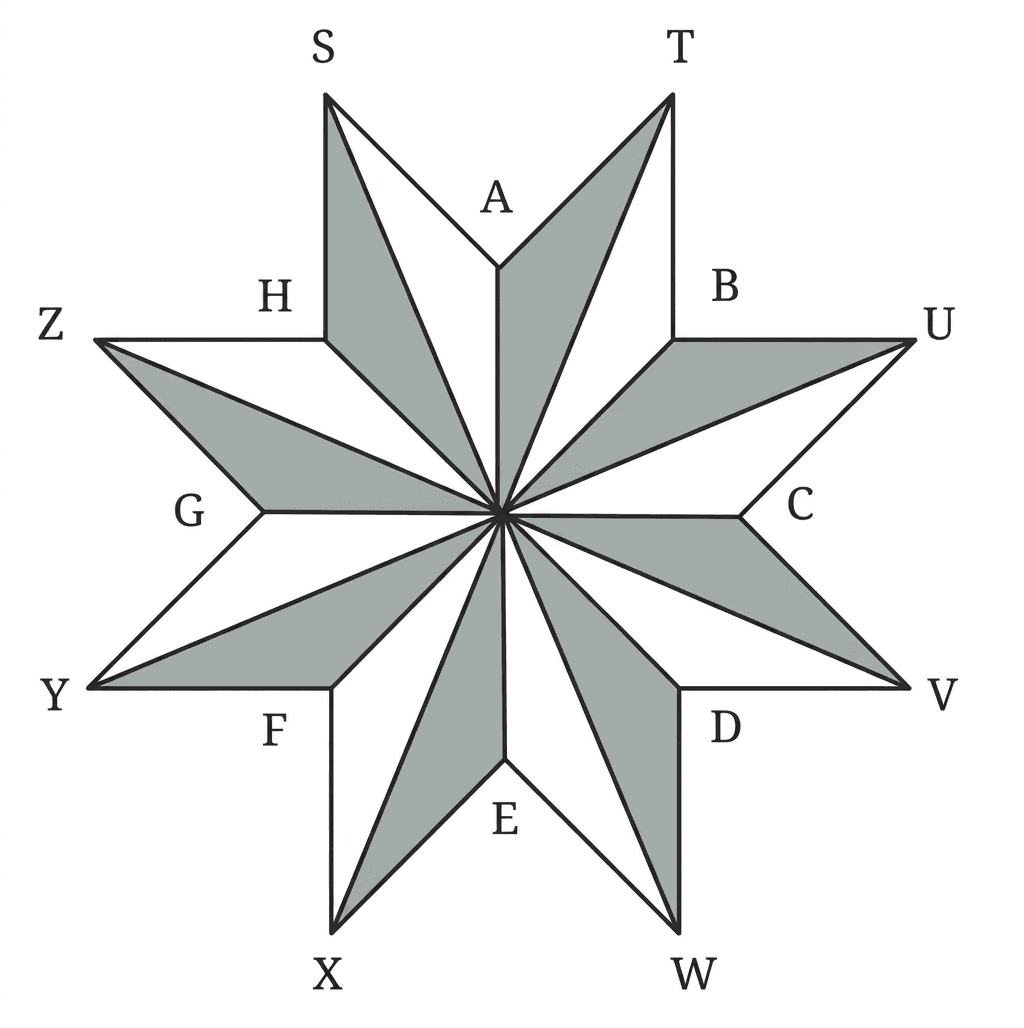
- To construct the given 8-pointed star design:
- Draw a circle and divide its circumference into 8 equally spaced points using perpendicular diameters and their angle bisectors.
- Join the vertices by skipping two points at a time (connecting each vertex to the third point clockwise) to form the 8-pointed star outline.
- Shade the 8 inner triangular regions while leaving the 8 outer star points unshaded.
Step 1 · Draw Base Circle and Divide into 8 Equal Parts
Draw a circle and locate 8 equally spaced points on its circumference.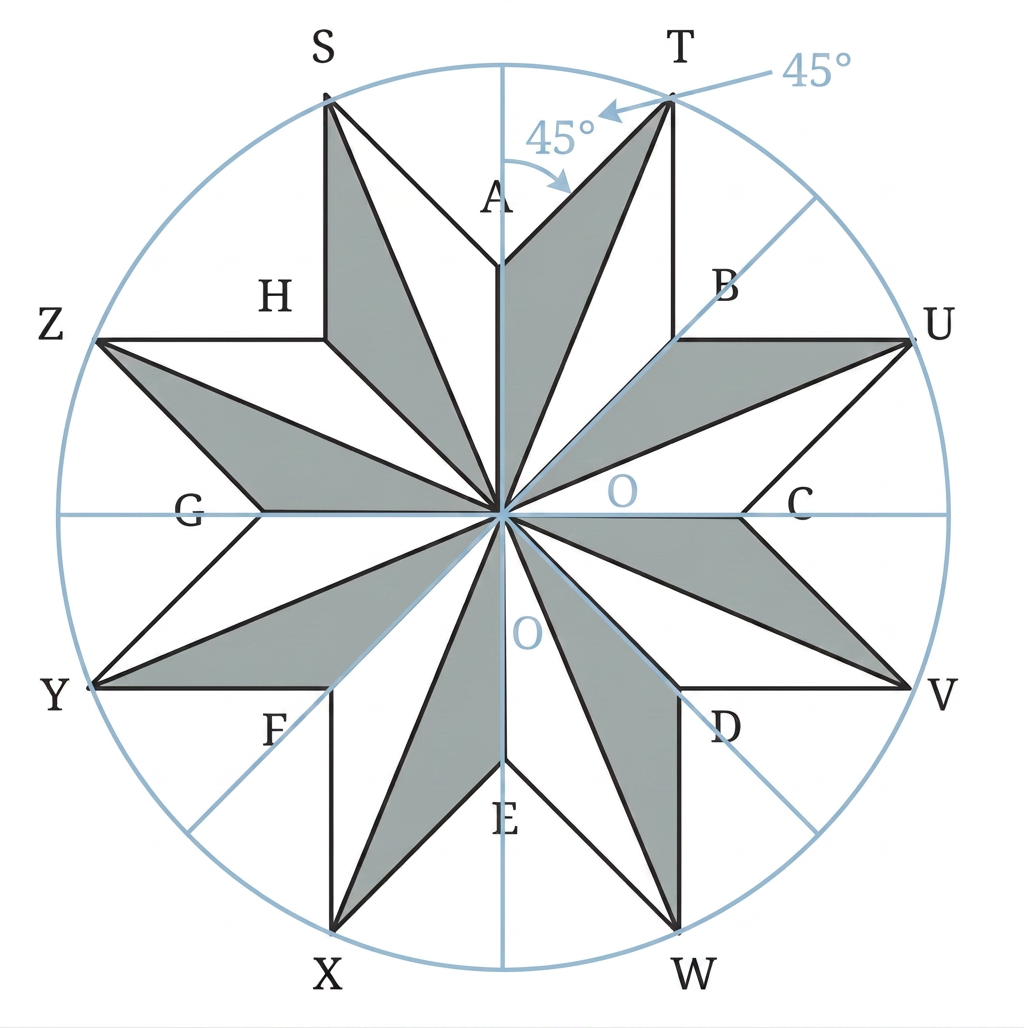
- Draw a circle with center .
- Draw two mutually perpendicular diameters passing through to mark 4 equally spaced points.
- Bisect the angles between these diameters and extend the bisectors to the circumference to obtain 4 more points.
- Label these 8 equally spaced points clockwise as starting from the top.
Step 2 · Draw Star Outline
Join the points on the circle with straight line segments to form the star.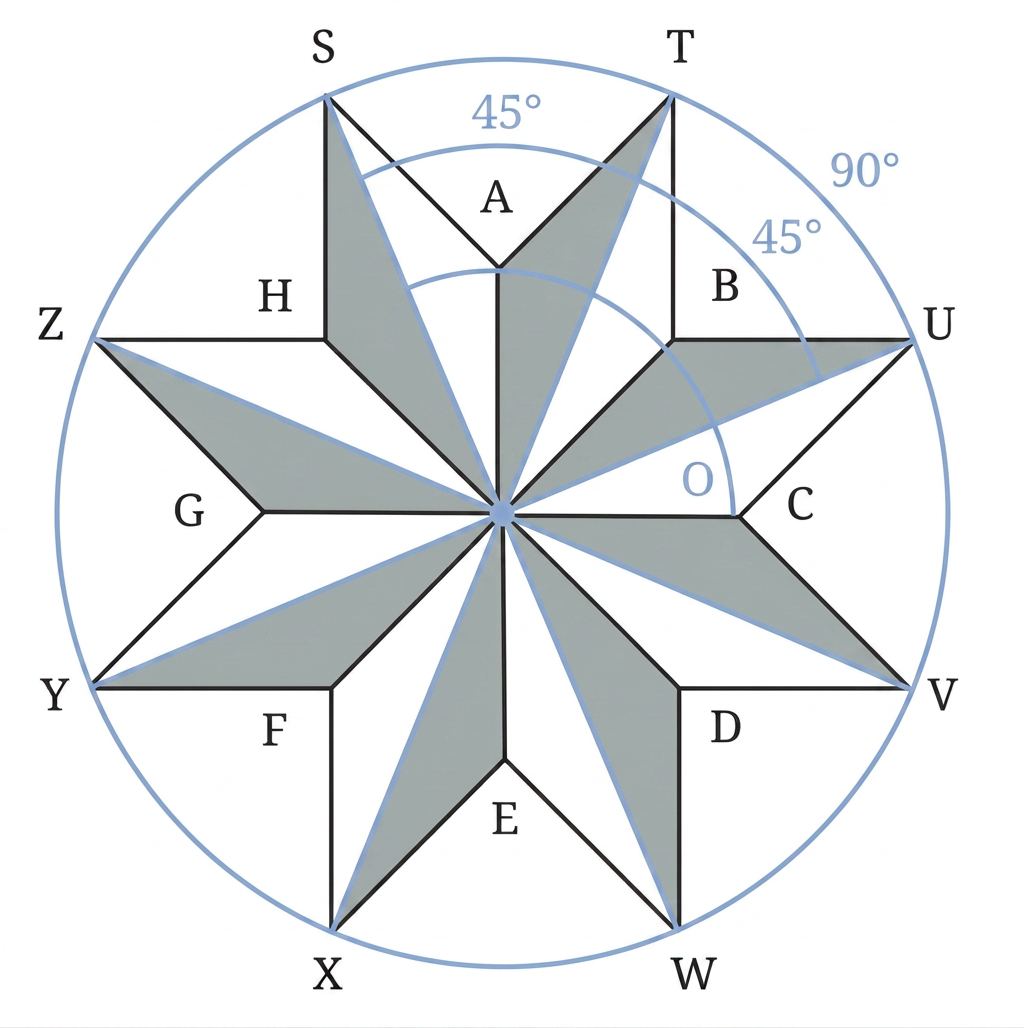
Draw the following 8 straight line segments:
- to
- to
- to
- to
- to
- to
- to
- to
Step 3 · Identify and Shade Required Regions
Shade the inner triangular regions of the star.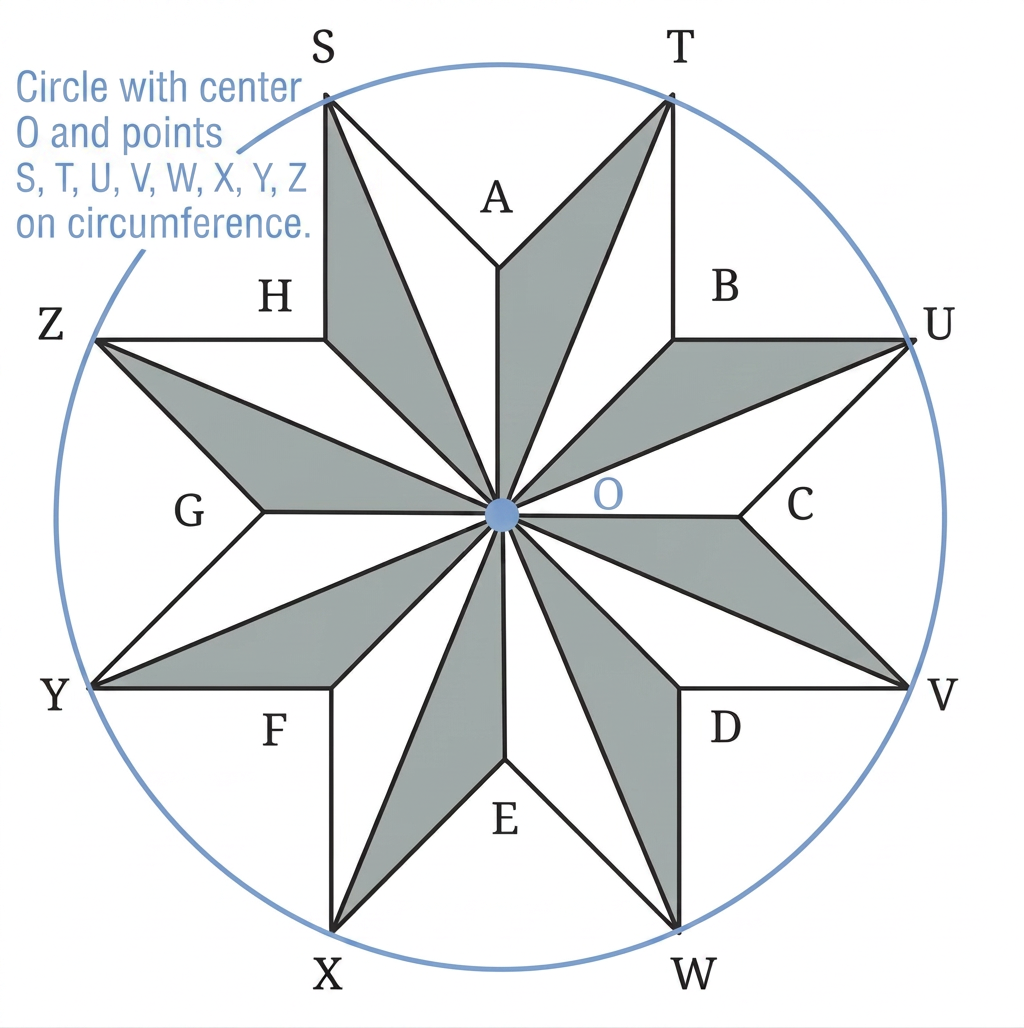
- Leave the 8 outer triangular points labeled unshaded (white).
- Carefully shade the 8 inner triangular regions forming the body of the star to match the given pattern.
The 8-pointed star figure is constructed and shaded as required.
- Unequal Sector Angles: Failing to accurately bisect the angles into angles, leading to an irregular star shape.
- Incorrect Point Connections: Connecting adjacent points (forming an octagon) or skipping the wrong number of vertices instead of connecting each point to the third point clockwise.
- Inverted Shading: Shading the outer star tips ( through ) instead of the alternating inner triangular regions.
More questions in FIO
When constructing the perpendicular bisector, is it necessary to have the same radius for the arcs above and below ? Explore this through construction, and then justify your answer.
[Hint 1: Any point that is of the same distance from and lies on the perpendicular bisector.
Hint 2: We can draw the whole line if any two of its points are known.]
Is it necessary to construct the pairs of arcs above and below ? Instead, can we construct both the pairs of arcs on the same side of ? Explore this through construction, and then justify your answer.
While constructing one pair of intersecting arcs, is it necessary that we use the same radii for both of them ? Explore this through construction, and then justify your answer.
Recreate this design using only a ruler and compass —
Justify why in Fig. 6.4 is the perpendicular bisector.
Can you think of different methods to construct a angle at a given point on a line using a rope?
Construct at least 4 different angles. Draw their bisectors.
Construct the 8-petalled figure shown in Fig. 6.5.
In Step 2 of angle bisection, if arcs of equal radius are drawn on the other side, as shown in the figure, will the line still be an angle bisector? Explore this through construction, and then justify your answer.
What are the other angles that can be constructed using angle bisection? Can you construct angle?
Come up with a method to construct the angle bisector using a rope.
Construct the following figure.
How do we construct the petals so that they are of the maximum possible size within a given square?
Construct at least 4 different angles in different orientations without taking any measurement. Make a copy of all these angles.
Construct the Fig. 6.6.
Construct 4 pairs of parallel lines in different orientations.
Construct the following figure.
Use support lines in Fig. 6.11 to construct a pointed arch. Make different arches, by changing the radius of the arcs.
Make your own arch designs.
Construct the following figures:
Optical Illusion: Do you notice anything interesting about the following figure? How does this happen? Recreate this in your notebook.
Construct this figure.
[Hint: Find the angles in this figure.]
Draw a line and mark a point anywhere outside the line. Construct a perpendicular to the given line through .
[Hint: Find a line segment on whose perpendicular bisector passes through .]
How can the tangram pieces be rearranged to form each of the following figures?
Are the following tilings possible?