Question 3
In Fig. 5.11, mark the parallel lines using the notation given above (single arrow, double arrow etc.). Mark the angle between perpendicular lines with a square symbol.
(a) How did you spot the perpendicular lines?
(b) How did you spot the parallel lines?
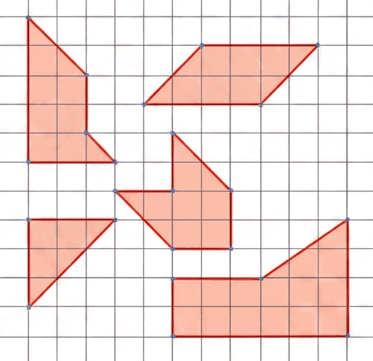
- Perpendicular lines: Lines that intersect at a right angle (), indicated by a square symbol at their corner.
- Parallel lines: Lines in the same plane that never intersect and remain equidistant throughout, marked with matching arrowheads ( or ).
- A background grid provides a direct reference to spot horizontal, vertical, and slant alignments.
(a) How did you spot the perpendicular lines?
Step 1 · Identify Perpendicular Lines
Perpendicular lines meet at a right angle ().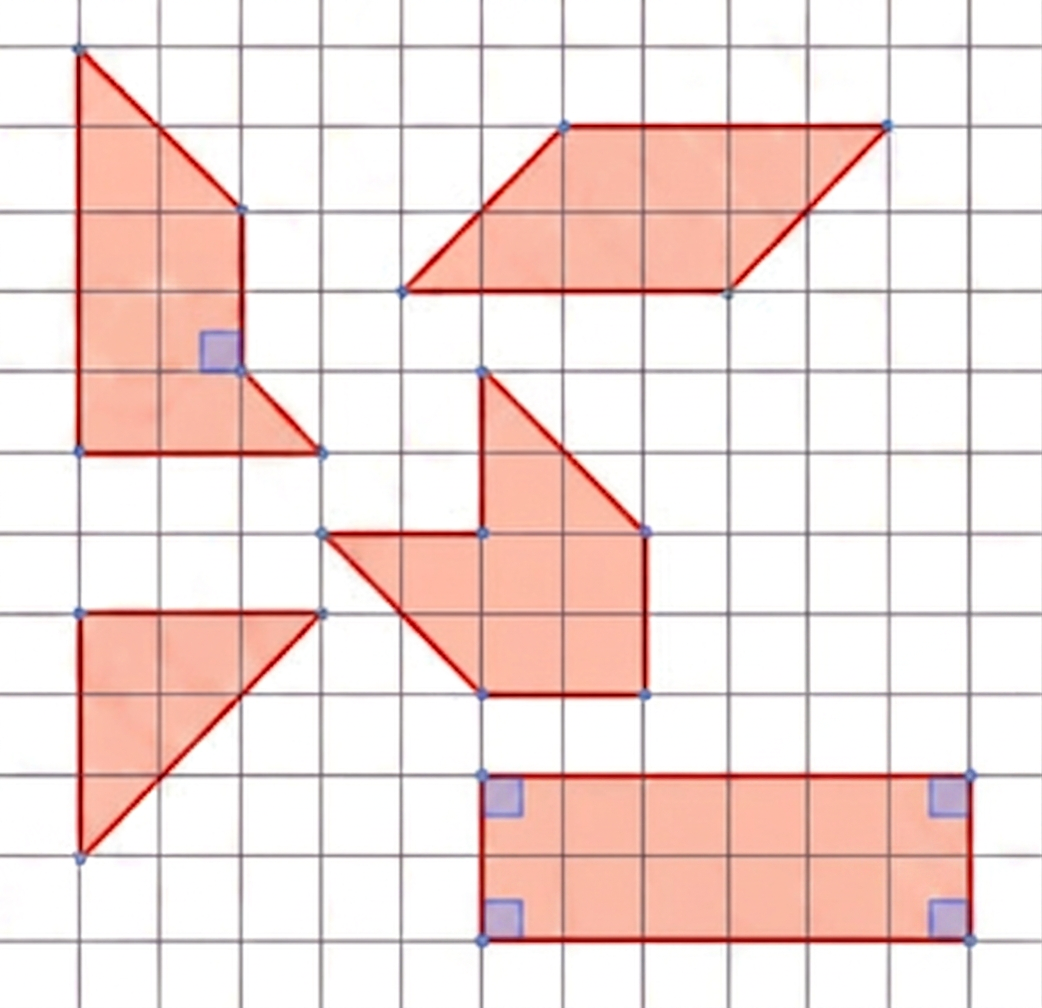
- On a grid, perpendicular lines typically form square corners where a horizontal line segment meets a vertical line segment.
- The intersection is marked with a small square symbol to indicate the angle.
(a) Perpendicular lines are spotted by looking for lines that intersect at a right angle (), forming square corners (such as horizontal and vertical grid lines meeting).
(b) How did you spot the parallel lines?
Step 1 · Identify Parallel Lines
Parallel lines maintain a constant distance apart and never meet, no matter how far extended.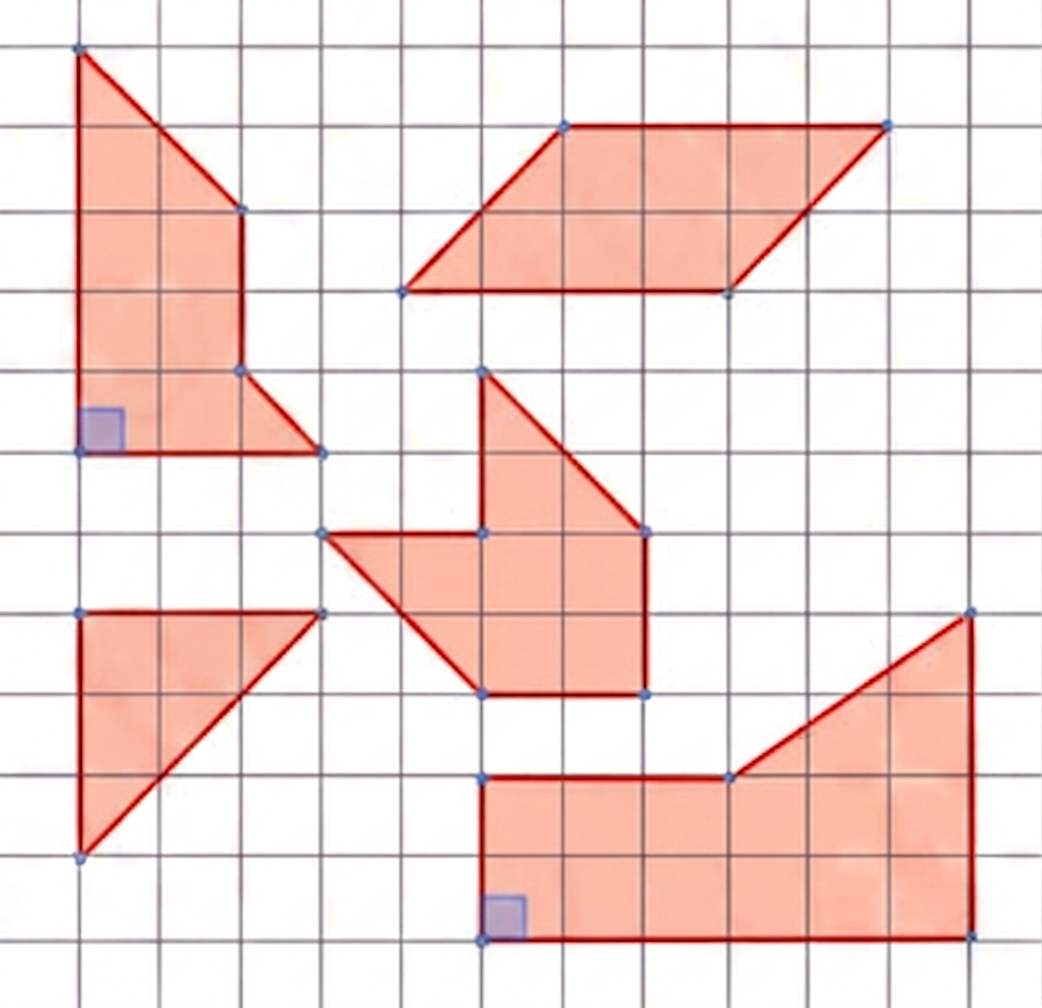
- On a grid, lines running in the exact same direction (horizontal with horizontal, vertical with vertical, or diagonal lines with equal slope) are parallel.
- Pairs of parallel lines are marked using matching arrow symbols (single arrows for one pair, double arrows for another).
(b) Parallel lines are spotted by looking for lines that run in the exact same direction and always stay the same distance apart without ever meeting.
- Confusing Perpendicular and Intersecting: Any two crossing lines are intersecting, but they are only perpendicular if the angle between them is exactly .
- Arrow Notation Mixing: Using the same arrow marker (e.g., single arrow) for multiple independent pairs of parallel lines rather than distinguishing them with single, double, or triple arrows.
- Misjudging Slanted Lines: Assuming non-horizontal/non-vertical lines are parallel without verifying that they have identical slopes across grid units.
More questions in FIO
List all the linear pairs and vertically opposite angles you observe in Fig. 5.3:
Draw some lines perpendicular to the lines given on the dot paper in Fig. 5.10.
In Fig. 5.11, mark the parallel lines using the notation given above (single arrow, double arrow etc.). Mark the angle between perpendicular lines with a square symbol.
(a) How did you spot the perpendicular lines?
(b) How did you spot the parallel lines?
In the dot paper following, draw different sets of parallel lines. The line segments can be of different lengths but should have dots as endpoints.
Using your sense of how parallel lines look, try to draw lines parallel to the line segments on this dot paper.
(a) Did you find it challenging to draw some of them? (b) Which ones? (c) How did you do it?
In Fig. 5.13, which line is parallel to line — line or line ? How do you decide this?
Can you draw a line parallel to , that goes through point ? How will you do it with the tools from your geometry box? Describe your method.
Find the angles marked below.
Find the angle represented by .
In the figures below, what angles do and stand for?
In Fig. 5.33, and . Find angles , ,
In Fig. 5.34, is parallel to and is parallel to . Also, is perpendicular to . If , find the values of and .
What is the measure of angle in Fig. 5.35?
[Hint: Draw lines parallel to LM and PQ through points N and O.]